By: ledirlo
History palette:
The history
palette is just like a fantastic expansion of the edit menu: it lets you
handle different states of your documents so you can always go back, it
lets you save some RAM, and is especially usefull when you submit different
versions of a project.
When
I made my jeans boots, my file soon ended up with more than 50 layers
which included masks, adjustment layers, etc...hard to handle, both for
me and Pshop, and very risky.Also,I needed to be able to go back at some
early states of my document, therefore I created history snapshots before
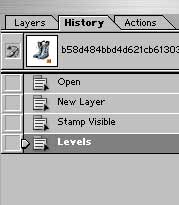
every critical operation : if you look at your history palette, you'll
notice it displays every operation you made
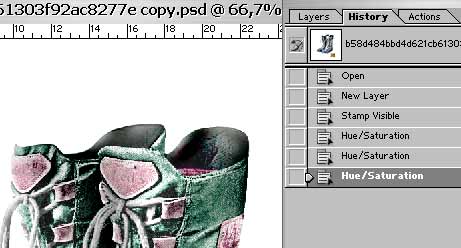
Just try it: open a document, and change its hue (CTRL+U) to change its
color, repeat twice, with different colors..(ie: red, green, yellow).Then
your history palette should look like this
Now, by clicking on the different history states, you can compare, get
rid of one state by draging it into the trash can at the bottom of the
palette, or create a new document from it...and this is the most usefull
tool, as it lets you work on a new documpent, you can just save and close
your original file to be sure you dont destroy/alter it.Also, when you
work on a file that involves all your RAM ressources because it's huge,
and have finished preparing it, create a new document from its current
state , then flatten the layers, and work easily on it to correct colors,
or do some various final retouching operations.
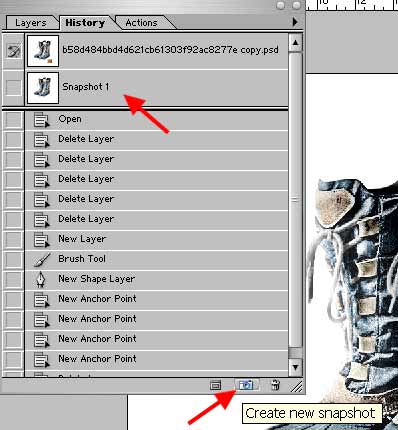
For instance, I want to make a pic in which I have different versions
of the boots.As the boots are composed of 40+ layers, I have to flatten
them all, so I take a snapshot of its current state so I can go back to
it
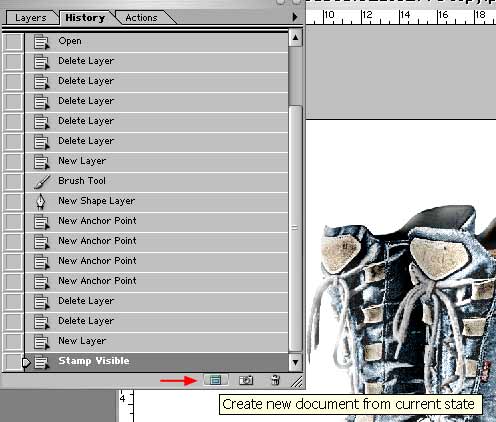
now just merge all layers into a new layer on top of the above as done
in the previous lessons, (ctrl+shift+N, then alt+ctrl+shift+E), and I
create a new document from this state so I can work easily on it, without
all the ressource taking non visible layers
Now I can save and close the original file, and work only on the recently
created one, and I can delete all the layers I dont need anymore , and
keep only the one I have merged all the visible layers into.The easiest
way to do it it to toggle off all these layers , by ALT+clicking on the
eye on the layer you want to keep, and then choose "delete hidden
layers" from the layer palette menu
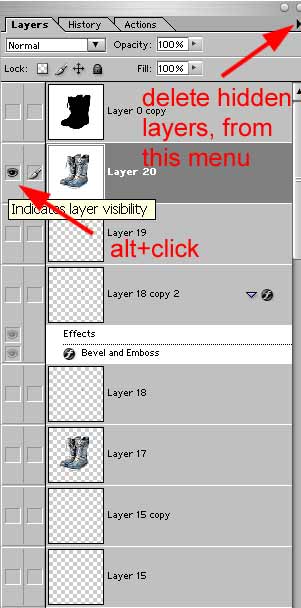
Now you you have a safe original file, which contains all your masks,
etc, and a new file it is safe to work on.Since I had to use 4 different
files to make the boots, I could not even imagine what I should have done
if I had had to work with limited undos. Hopefully this will prevent you
from making pics that don't look the way you want them to just because
you can't go back.
� all photoshop tutorials
|