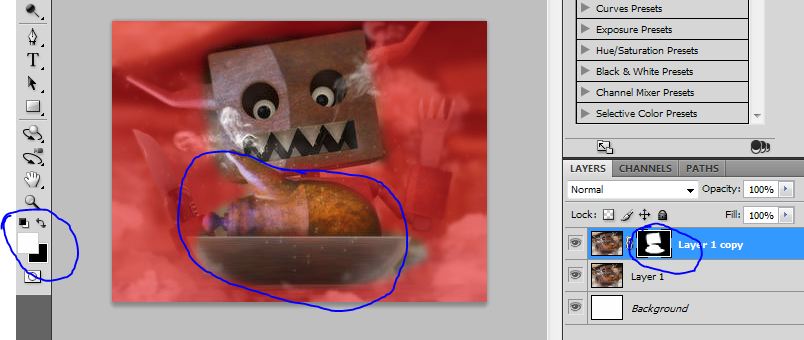
mmm... ok, i think we missed one little detail, an extra layer.
Now here is a mini-tutorial:
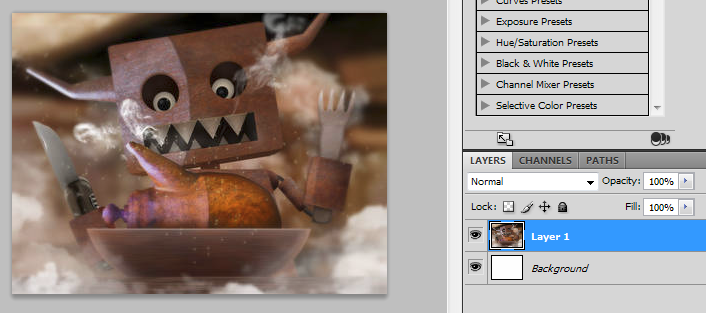
1. Open the image you want to work with. Notice the white background, thats what makes your red mask above look so "solid".
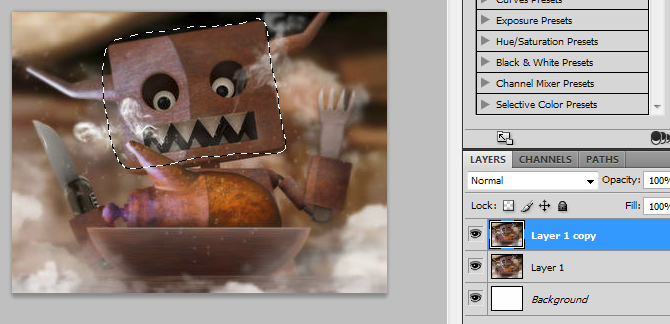
2. Now make a copy(!) of that image layer and start selecting the area of interest. You can use quick select, quick mask even, or any other tool. I used the lasso here:
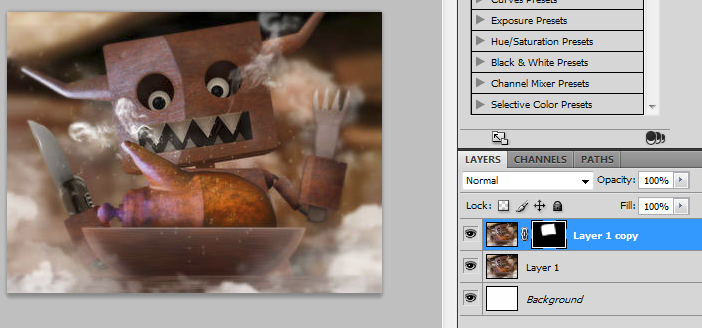
3. When you have selected something, click on "new layer mask" and you will see - no change

That's because parts of the image are masked, but the original layer below is showing through:
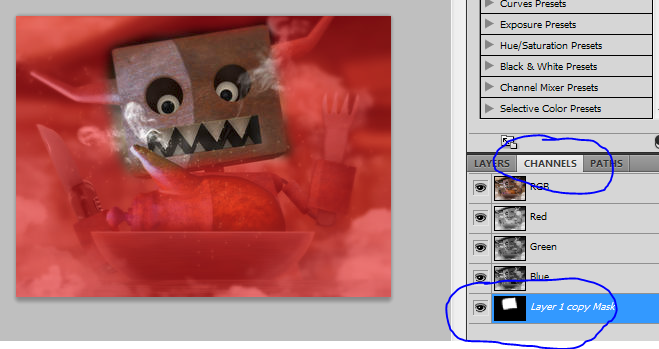
4. NOW you go to the channels and activate the "layer XY mask"
5. Finally you can go back to the layer palette, select the layer mask and start painting (=adjusting your mask). If you are done adjusting, you go back to channels and disable the "Layer XY mask" again!
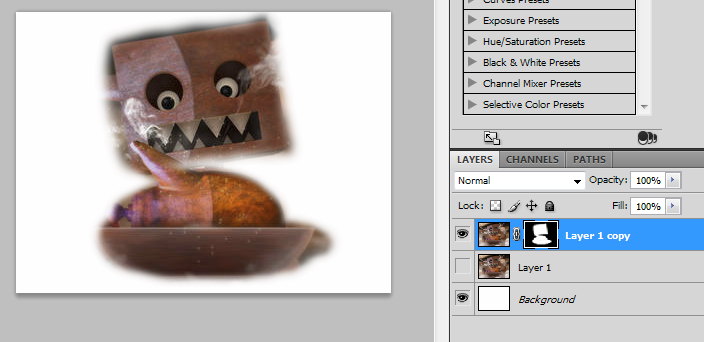
6. If you then disable the original unmasked image layer, the white background will be visible and on top of it: the (un)masked image parts.
You could now even ctrl-click (Windows) the mask icon to actually
select these areas for further use.
Happy masking!


